SpeakUp – System Admin Info
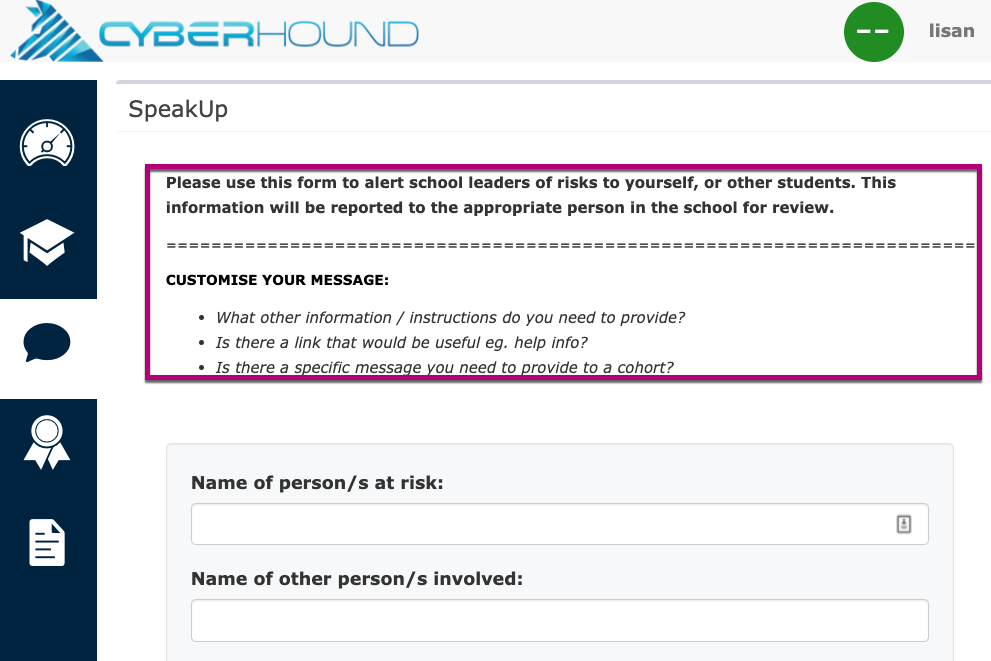
SpeakUp is available, within the LiveZone portal, to allow students to privately share concerns or incidents. Users with access to SpeakUp are presented with options to select, which helps to provide key information clearly and offers fields to say it in their own words. These concerns are then provided to the leadership team via an instant email alert or scheduled report.
LiveZone profile configuration to enable SpeakUp and options for alerts and/or reporting of incidents. Provide access permissions for leadership team to view and investigate activity.
- Data Retention
- Customise selection lists
- Profile Settings
- Submission Header Customisation
- SpeakUp Data Source Queries
- SpeakUp Email Alert Message
- Data source access permission
To enable the SpeakUp feature in LiveZone, access via sidebar navigation pane: Configuration > Web Interface > Configure LiveZone click on ‘Configure’
A Profile is required for end users and consideration should be given to how many profiles are required. Separate profiles are effective for providing specific:
- Notification options e.g. A profile for each student cohort or House group allows delivery of email alerts to specific staff members, if this option is enabled.
- Customisation of the interface header form to provide details specific for a particular cohort of students.
- PLUS option for Acceptable Use Policies, can be tailored for specific cohorts e.g. special needs students have different policy or Seniors policy is different to Juniors.
- PLUS option for multiple teacher profiles to be created to ensure staff are limited to view only specific student groups e.g. Senior teachers only view senior student activity in LiveView
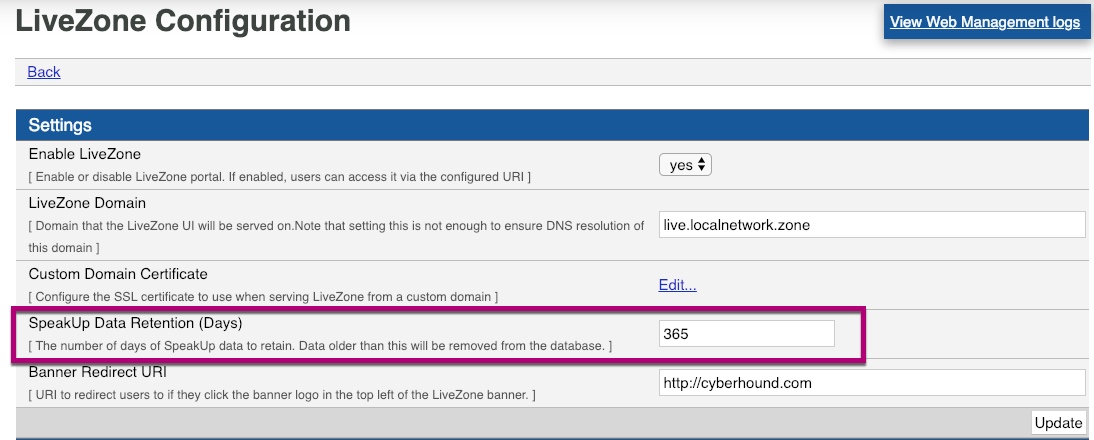
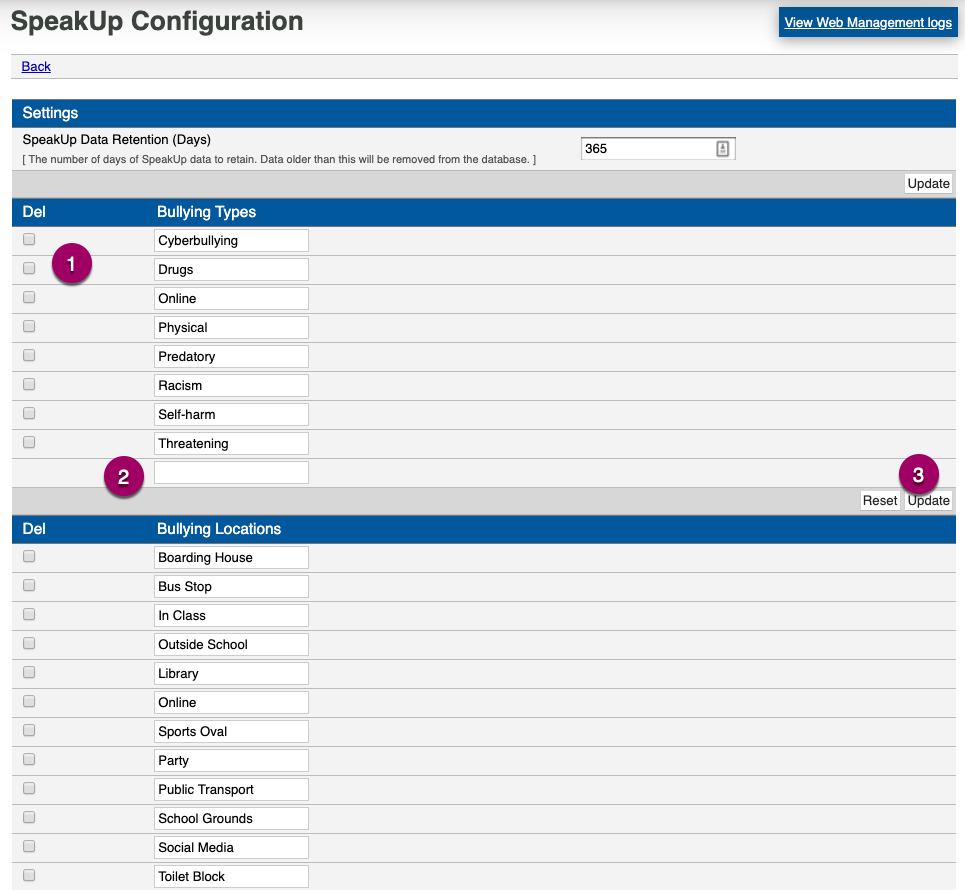
Data Retention
SpeakUp Data Retention (Days) default is 365 days for incidents retained on the CyberHound Appliance.
NOTE: V32 access via field SpeakUp Configuration [Edit].
Customise Selection Lists
V32 offers the option to customise the two drop down lists in the interface, to delete or add new options for students to select.
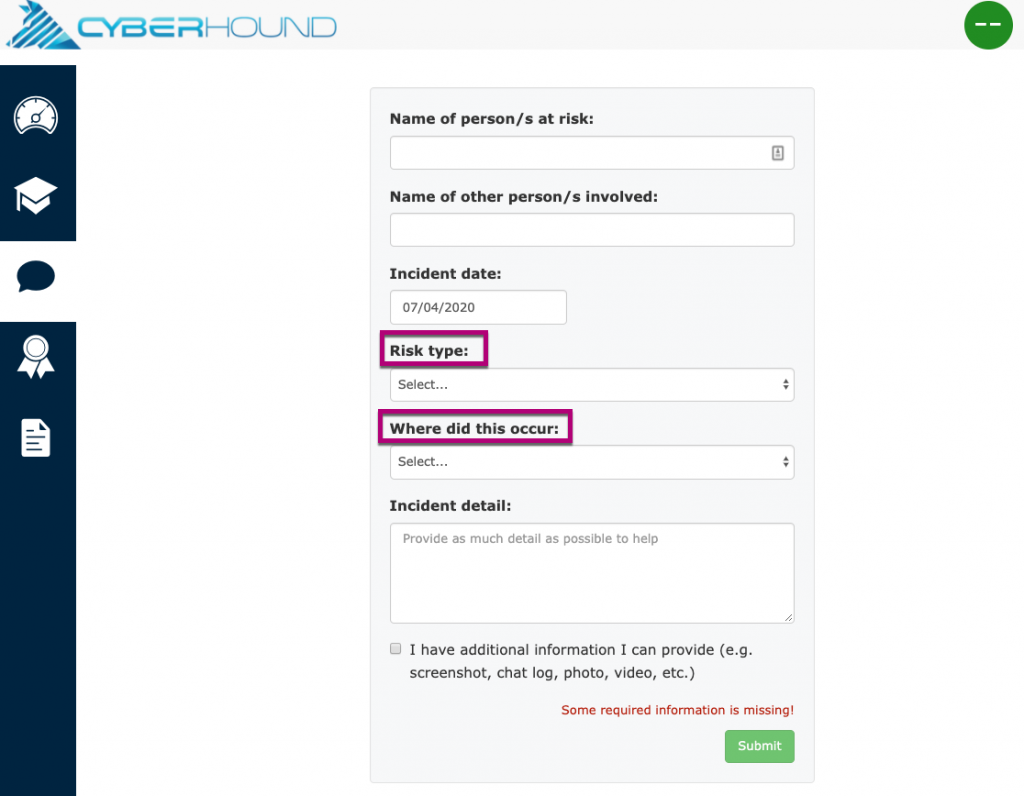
V32 modify the list via: SpeakUp Configuration Select [Edit]

Modify the lists as required. NOTE: These changes will be effective for all profile interfaces.
- Tick box to delete an option
- Add new type or location options
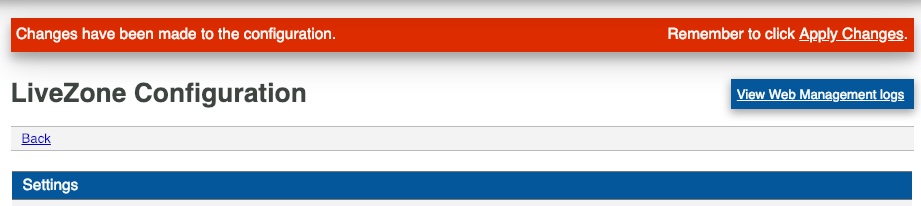
- Update to save the changes. Once all LiveZone configurations are complete, ‘Apply Changes’ to make available for end users.
Profile Settings
Create a new Student Profile, select ‘Add New Profile’, modify an existing profile, select ‘Edit Profile’. (for complete details of profile configuration refer to the LiveZone Sys Admin Info Sheet available on the CyberHound website Knowledge Base).
The following information only covers the SpeakUp fields.
- Enable – the default is ‘No’, select ‘Yes’ to enable icon visibility in the sidebar navigation pane in LiveZone. If left at NO, the icon will NOT be visible.
- Email alert – option to send an email every time an incident form is submitted. NOTE: You can only add one email address. (see below for Email Alert message)
EMAILS: Create more profiles for each student group if you require emails for different cohort areas of responsibility. e.g. SeniorYrLevelCoord@school.edu.au email address for incidents only reported by Senior students requires a profile with only relevant ‘Groups managed by this profile’ selected.
NO EMAIL: If NO email address is entered, incidents submitted by students, can be delivered via report as per the reporting schedule (see below for data source queries and reporting).
3. Submission Header – change or add to the default message on the header of the form (see more details below).
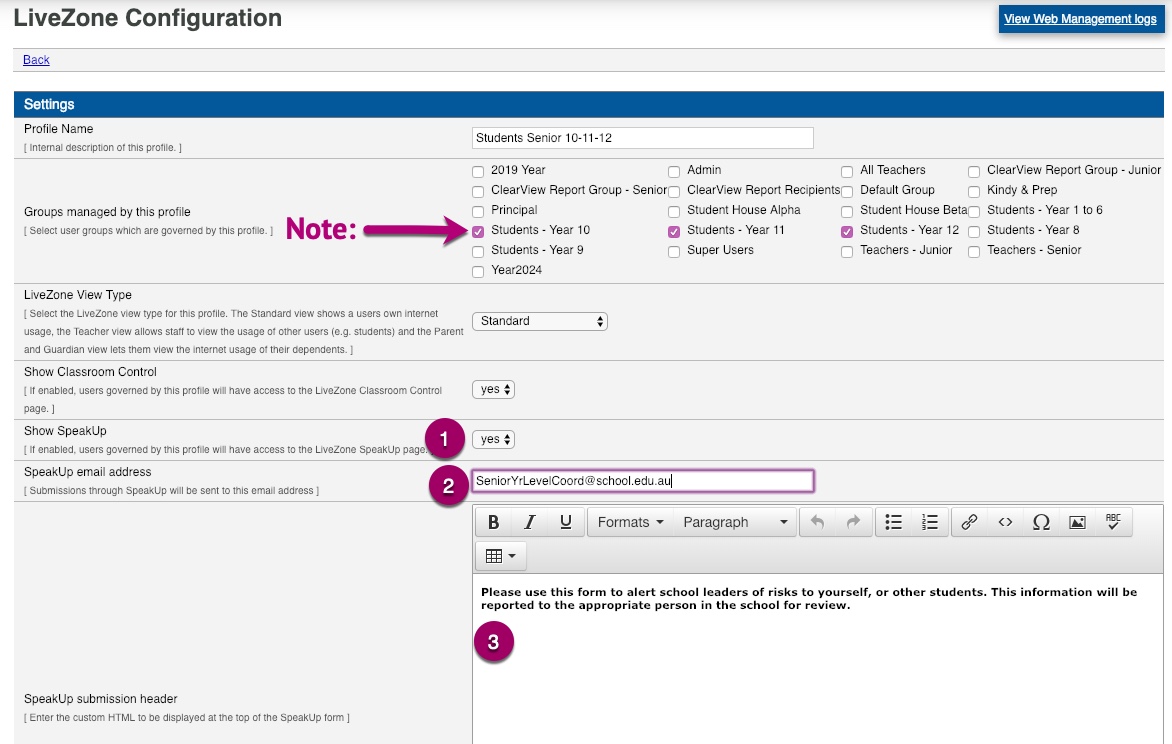
Once settings have been completed click ‘Update’ and continue to the next profile to set up and once all profiles have been completed ‘Apply changes’.
Submission Header Customisation
Each profile can be customised to deliver specific information relevant for the groups managed by the profile.
- Is there more information or instructions you need to provide?
- Do you have support info which you could provide a link to?
- Do you need messaging included specific for the cohort, different comments e.g. Senior message different to Junior?
Remember you can also customise the Acceptable Use Policy page to make relevant for the end user. (refer to LiveZone – System Admin Info Sheet on Knowledge Base)
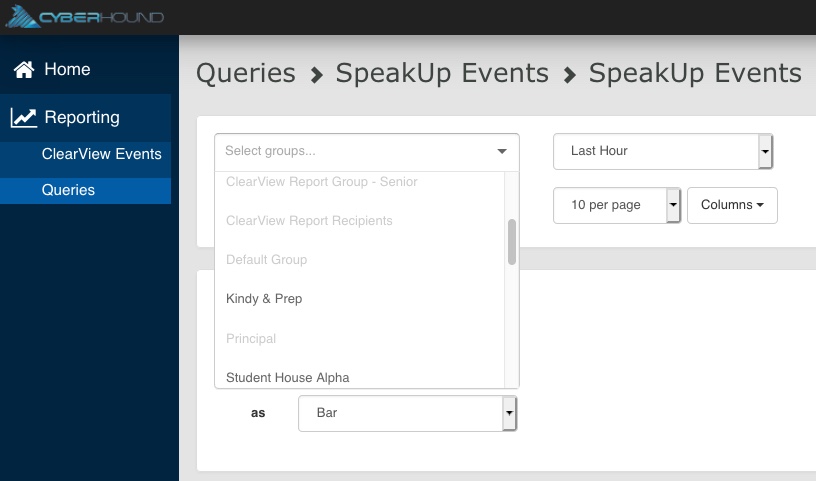
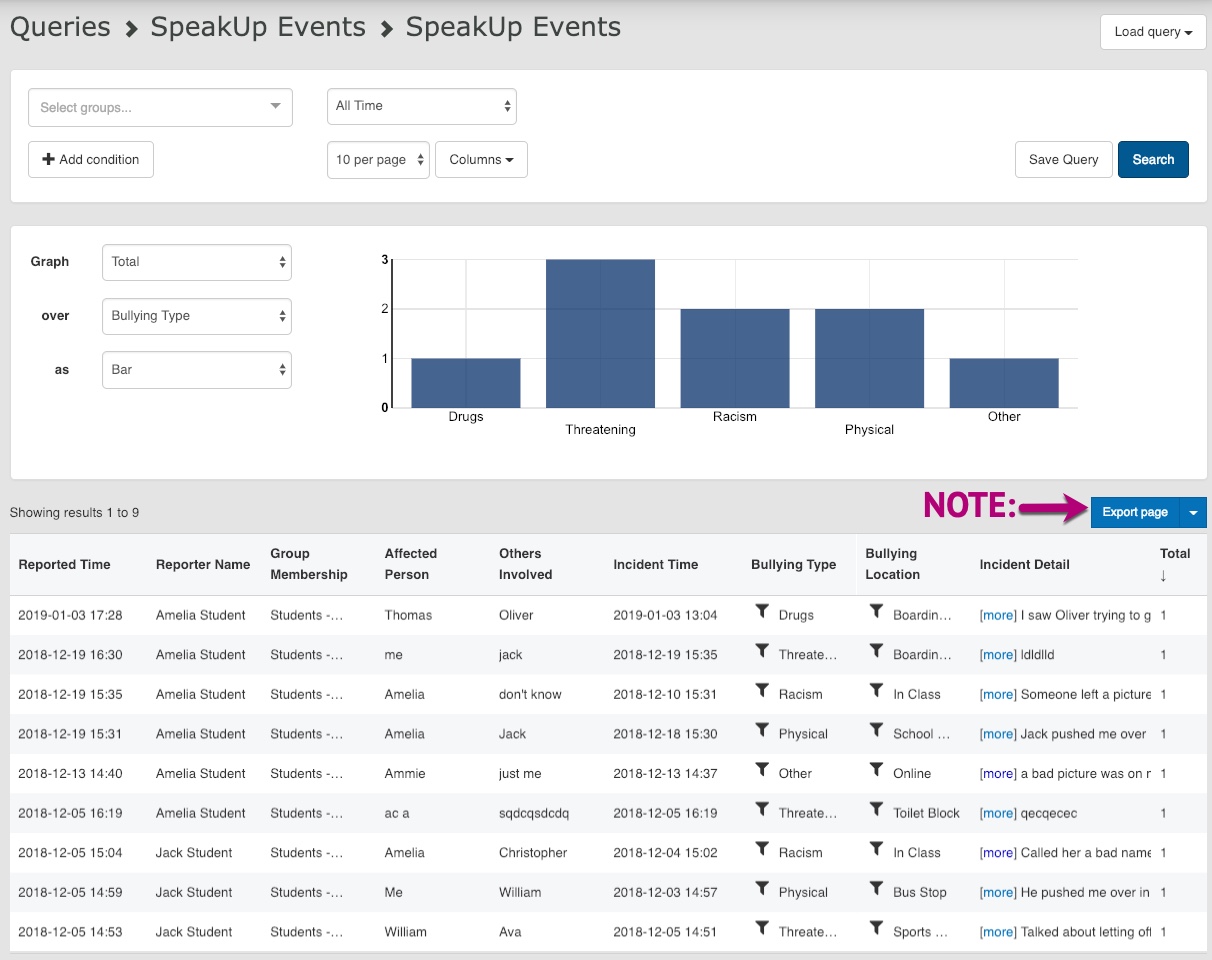
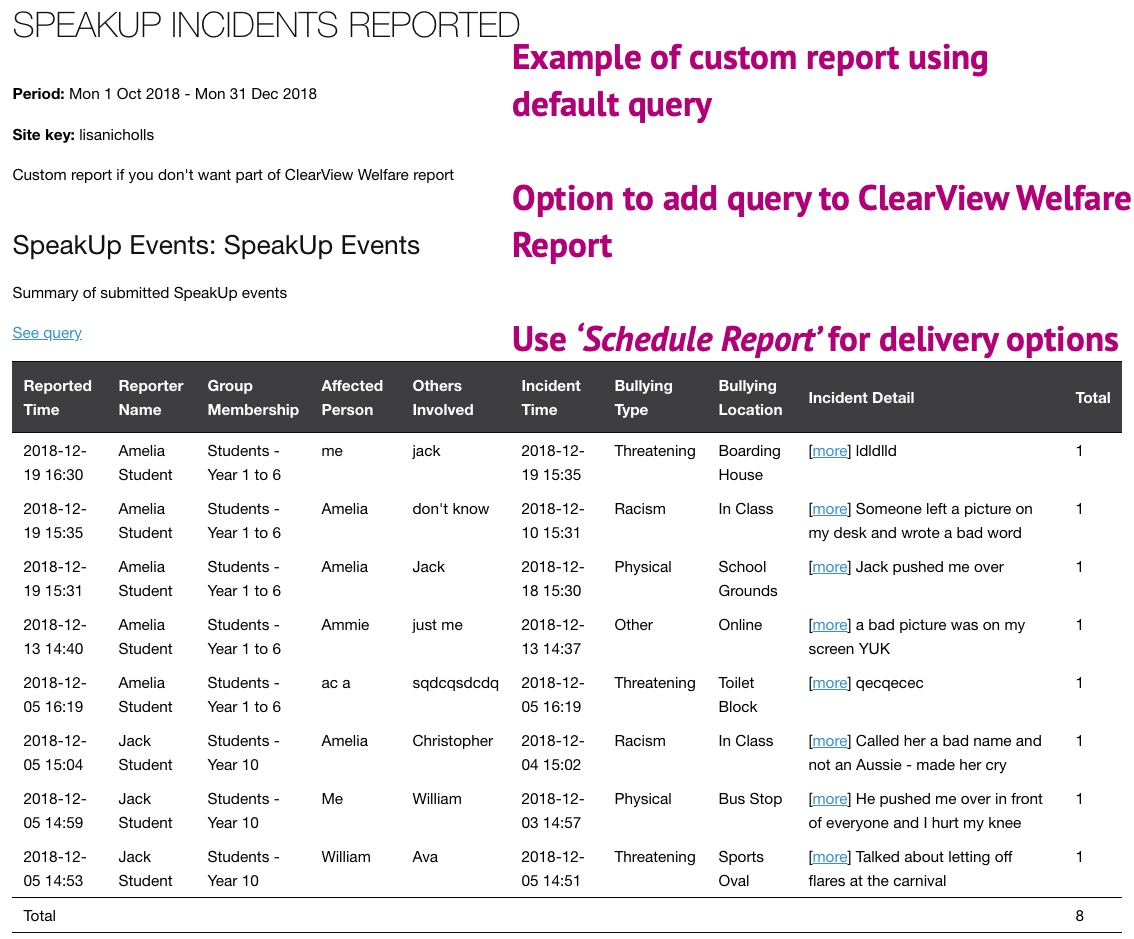
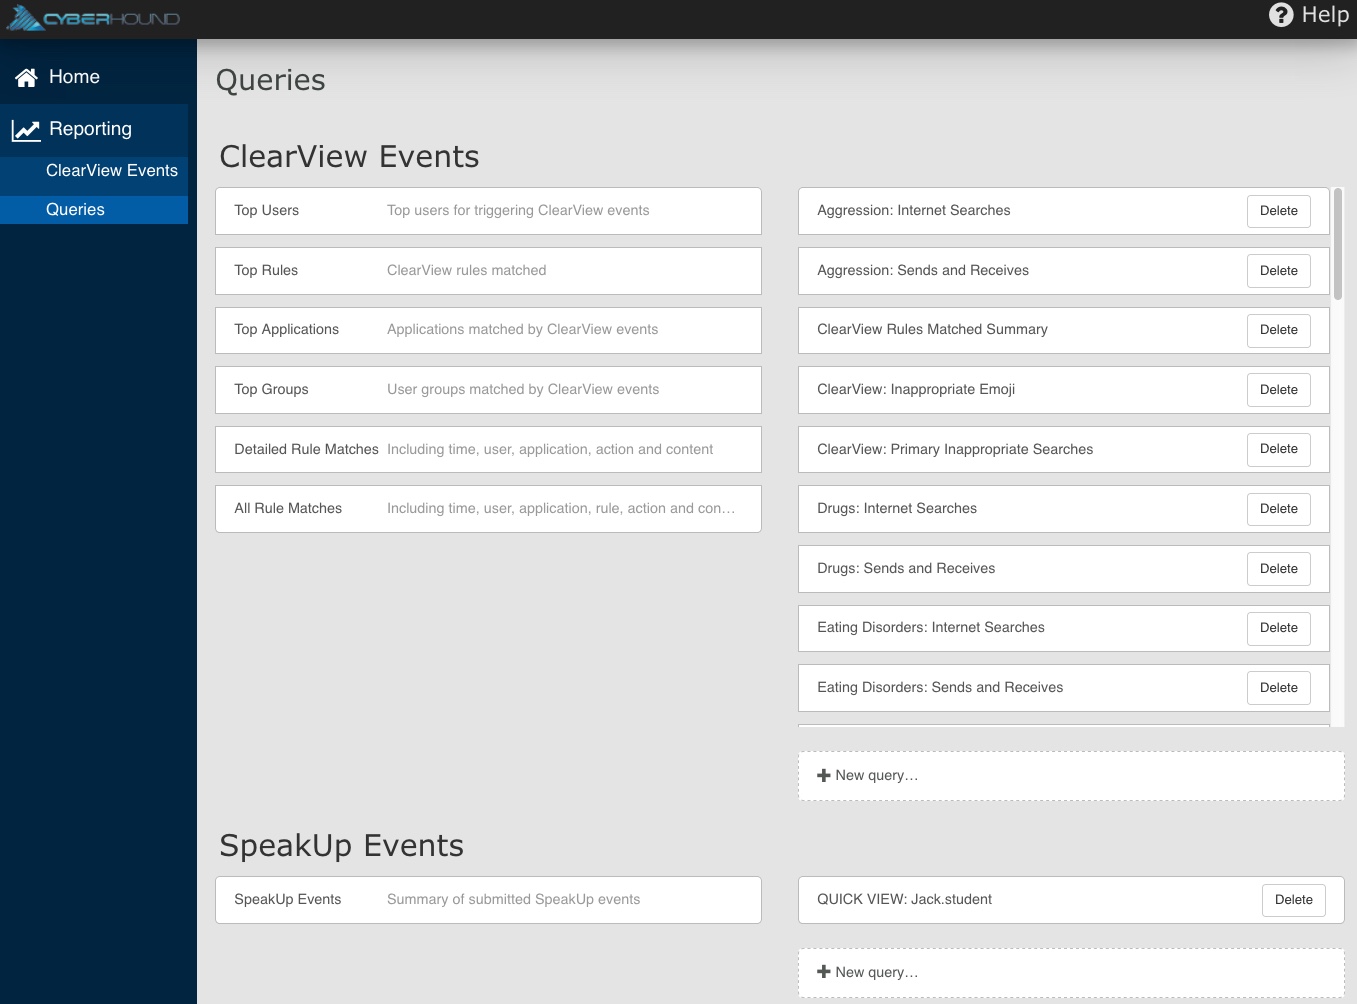
SpeakUp Data Source Queries
All incidents submitted are captured in the SpeakUp data source. Queries provide access to investigate incident history or real-time. If no email alerts option is required add a SpeakUp query to an exisiting report or design a new report or have both email alert and a report delivered.
Access via: Reporting > Queries
- A default query is available, option to add to the ClearView Welfare Report or build a new report if the information is required for different email recipients.
- Create a custom query for specific details. e.g. create and save on an individual user to add to a report for specific monitoring.
NOTE: The default query excludes a column to display if the student has ticked the box to indicate further evidence is available. Consider saving a new query with the evidence column ticked for ease of viewing for the report recipient, otherwise the report recipient will need to investigate each reported activity to know if student does have further info share.

NOTE: Staff with access to SpeakUp queries can use ‘Export page’ if details are required to be kept on file for future reference and before data retention expires, especially useful for individual user activity.
SpeakUp Email Alert Message
If the option to have incidents reported via email is set up in the profile, a message will be delivered for every individual submission.
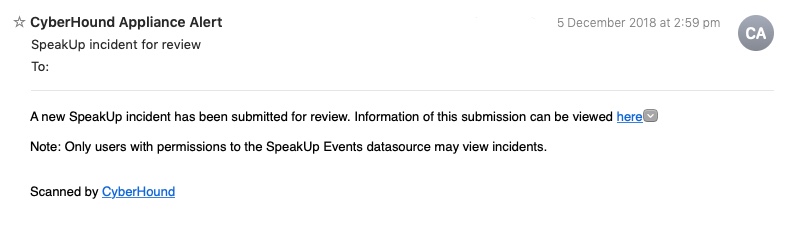
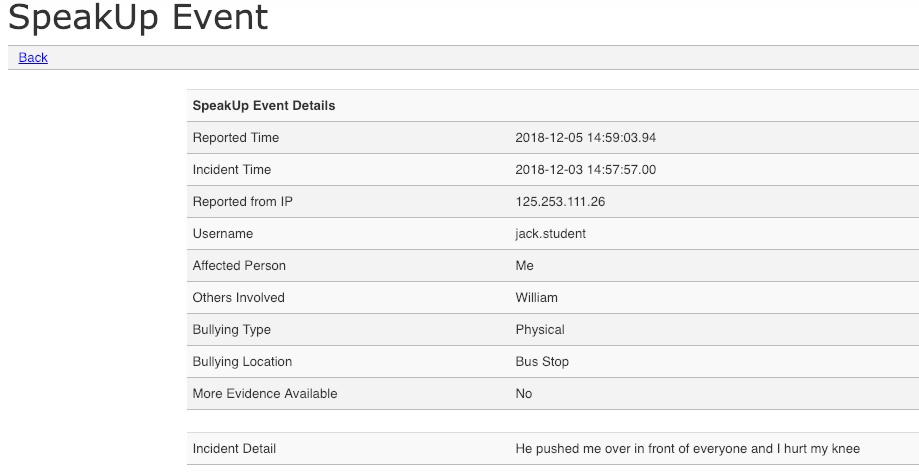
The email recipient will require data source permission to be able to view the details. When they click on ‘here’ they will be redirected to log into the CyberHound Appliance to view the incident details in the query.
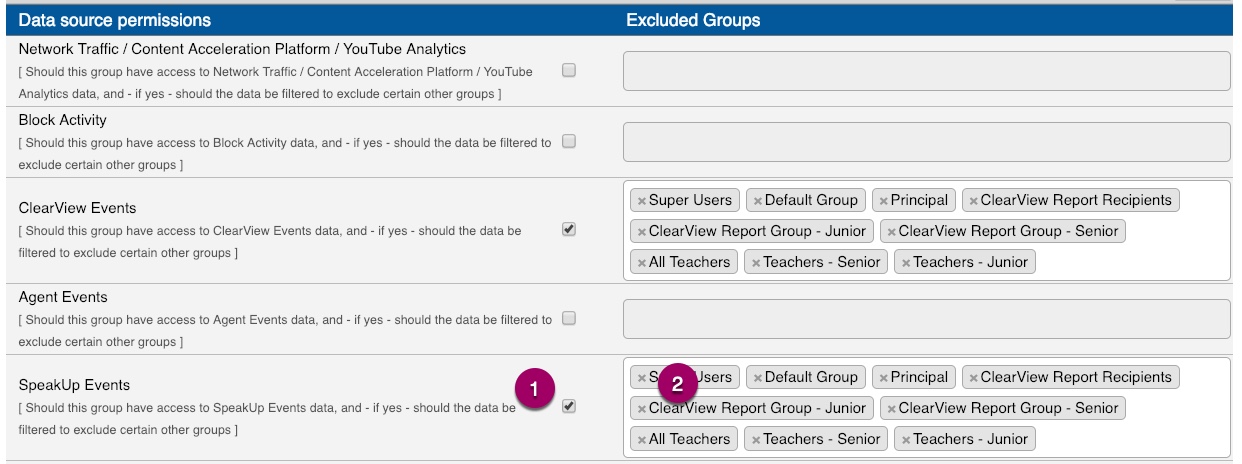
Data source access permission
Those receiving reports or instant email alerts, need to be provided access to view queries to investigate activity. Access permission can be restricted to allow visibility to only specific cohorts. Users & Groups > Manage Groups > [edit] specific group Scroll down to section ‘Data source permissions’. If there is no existing group, create a new group (see website for System Admin Data Sources Access & Permission info sheet).
- Permission – tick box to provide access to view data source
- Exclusions – simply select all groups these users should NOT have visibility to
The following examples demonstrates access for a group of users who have permission to log into the CyberHound appliance and view query results for both ClearView Events and SpeakUp Events but have been excluded to view any data on their work colleagues.
NOTE: To limit access to only view activity of specific student groups, simply add all the other student groups to the exclusion field. e.g. Only view Seniors activity, add all the Junior/Middle or lower Years to exclusion field.
Example of user interface where data source permission is granted as per above settings, view is limited to only two data sources.
NOTE: A user cannot delete or save queries, they can only modify to investigate data. If a specific query view is required for future reference, System Admin can save on end users behalf and it will be available in the list of custom queries.
Example of user interface Query accessibility. Only those groups that were NOT excluded can be accessed. The excluded groups are greyed out and results cannot be accessed. This also applies to any queries added to the list on an individual student, if the student is in a group that the user does NOT have access to view, the query will NOT load any results.
NOTE: The sidebar navigation pane is also restricted to only view the two data sources making it simple for navigation for end user.