LiveZone – Teacher Info Sheet
LiveZone provides access to usage analytics and resources for teachers and students in one simple interface. The following provides details of how to use the different features from a Teacher’s perspective.
There are ‘optional view’ settings that can be configured, the following interface views are demonstrating all the features enabled. Your IT Department will determine what is enabled.
Access Via: live.localnetwork.zone or access via LMS if available.
TIP: save link as favorite in your browser to access easily next time if not available via your LMS.

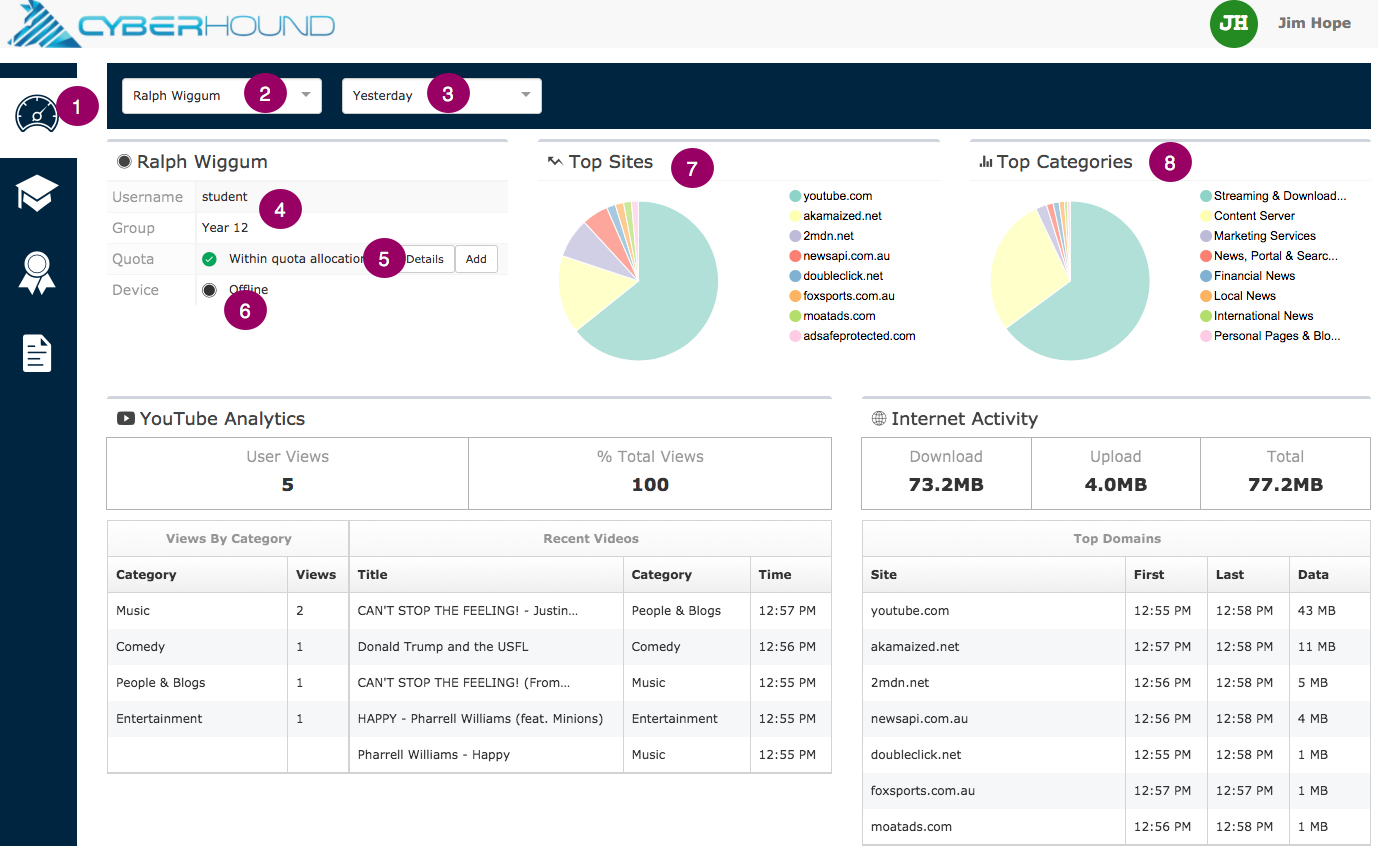
LiveView Dashboard
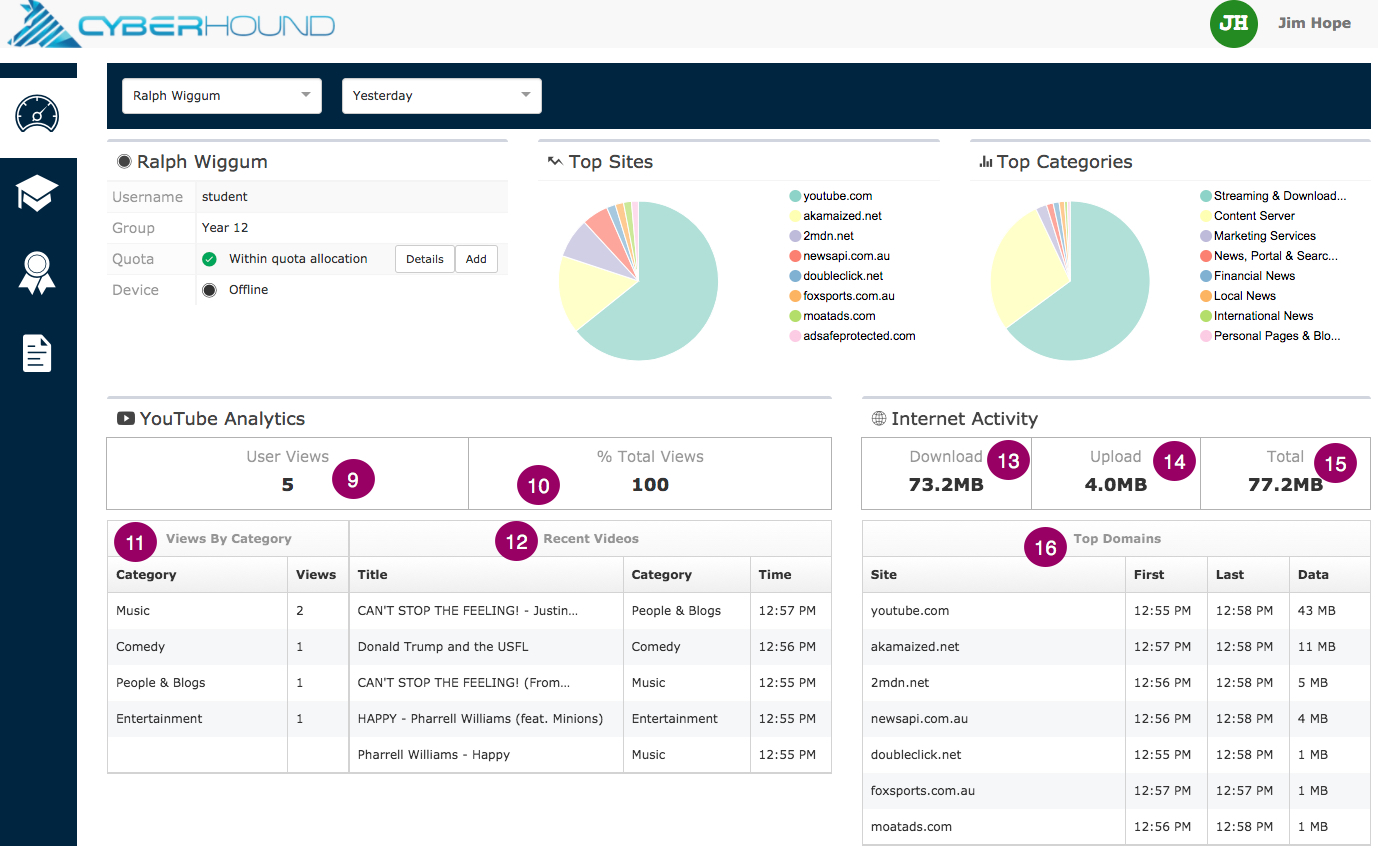
The LiveView dashboard provides teachers access to real-time student analytics in the classroom.
- LiveView – access via icon on navigation sidebar to view the dashboard.
- Student – look up the name of the student to view their activity.
- Timeframe – Option to choose from drop-down: Last Hour – Today – Yesterday.
- Details – Displays the student name and group. (optional view)
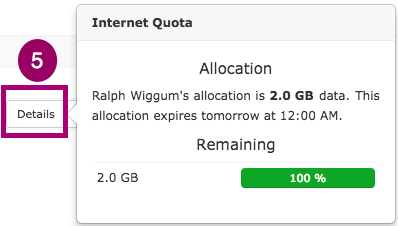
- Quota– If the school has quotas for students, click ‘Details’ to view remaining quota allocation. Teacher can click ‘Add’ to top-up the quota remaining. (optional view)
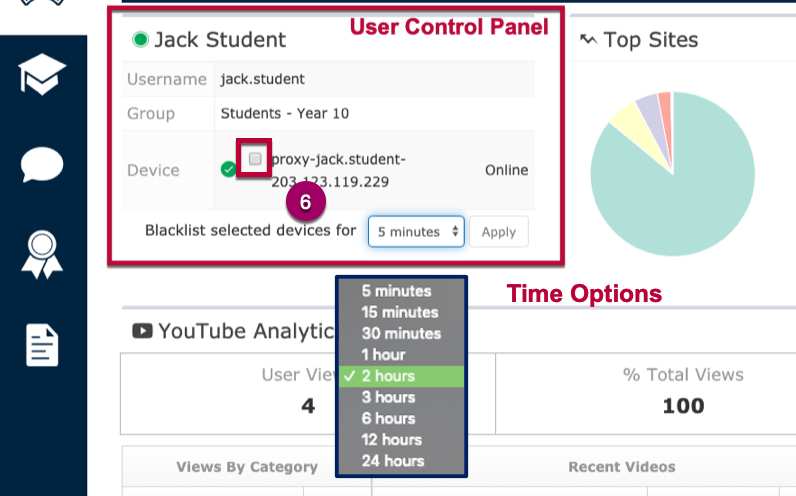
- Device – will indicate if the student’s device is on or off the network. It will display all devices a student has connected to the Internet. NEW feature is Blacklisting a device. You can select a device, a time and remove the device from accessing the internet. (optional view)
- Top Sites – Chart displays the top sites that the student has visited for the selected time period. Simply hover the mouse over any part of the pie chart to display details.
- Top Categories – Chart displays the top Internet categories that the student has visited for the selected time period. Simply hover the mouse over any part of the pie chart to display details.
- User Views – YouTube total of videos viewed for the selected time period.
- Total Views – The percentage represents the total views compared with all YouTube user views.
- Views by Category – Displays the total videos viewed by the category as determined by YouTube.
- Recent Videos – Provides details of the recent videos viewed for the timeframe selected with the most recently viewed at the top of the list. It provides the title of the individual video, the category and the time that it was first opened. NOTE: There is no way to determine how long a student viewed the YouTube Video, only when they first accessed it.
- Download – The total amount of download data for the selected time period.
- Upload – The total amount of upload data for the selected time period.
- Total – Total download and upload data used for the selected time period.
- Top Domains – Lists all the Internet sites visited for the time period selected. The ‘First’ column provides the time the first request was made to the website. ‘Last’ provides the time the last request was made to the site.

Classroom Control
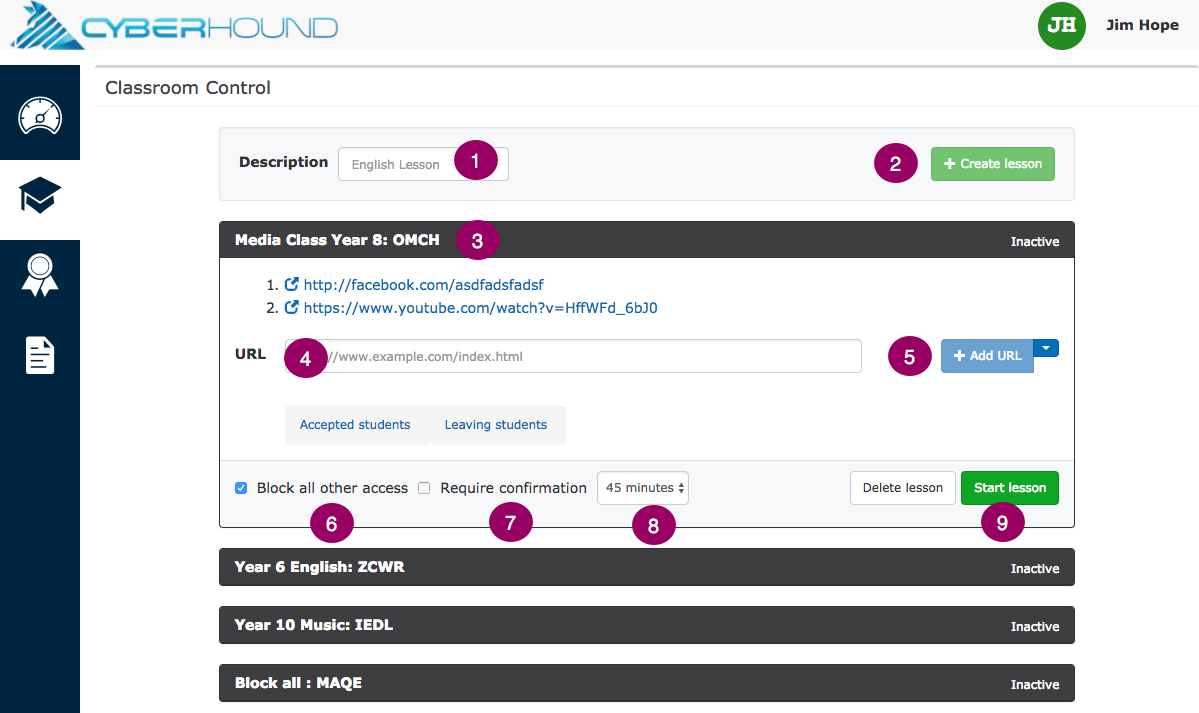
LiveZone provides access to Classroom Control in the navigation side bar menu. Teachers can create lessons and add links (URL’s)
Optional: Your IT Department will determine if this icon is available.
The complete User Guide and Videos for Classroom Control are available here.
The following is a brief outline of how to create a lesson and the additional options to manage the lesson:
- Name – create a descriptive name for the lesson that is easy to identify for future use. e.g. Year 9 Geography – Volcano.
- Create Lesson – After typing the name, click ‘+Create Lesson’.
- Unique Code – OMCH is the unique 4 Digit access code generated when the lesson is created. Students use this code to access the lesson in the classroom.
- URLs – copy and paste the URL from the webpage you require for the lesson. Multiple URL’s can be added and are displayed above the filed to add.
- Add – Simply click ‘+Add URL’ to create digital lesson content. Multiple URL’s can be added and are displayed above the filed to add. Optional: Add Whole Domains and/or Enable Web Filtering Override using the drop down arrow beside ‘+Add URL’. (see User Guide for further details)
- Block All Other Access – When ticked, students are blocked from accessing all Internet sites other than the content for the lesson.
- Require Confirmation – When ticked, it offers control over who joins the lesson by individually accepting students to view the links. Provides a higher level control for sensitive sites.
- Duration – Flexible options for how long the lesson is available to students.
- Start Lesson – This will allow students to enter their unique code to activate the lesson session. When the lesson concludes, simply click ‘Stop Lesson’ to release the students from the lesson session.
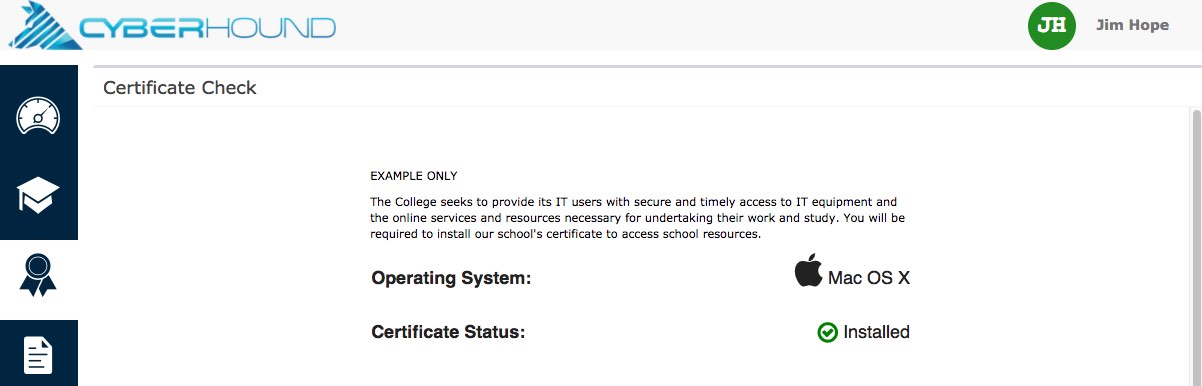
Certificate Check
LiveZone can provide visibility and easy access to check, or install, a certificate for your devices to authenticate your credentials for access to the Internet. Should you bring your own device, you can install the certificate via this screen.
Optional: Your IT Department will determine if this icon is available.
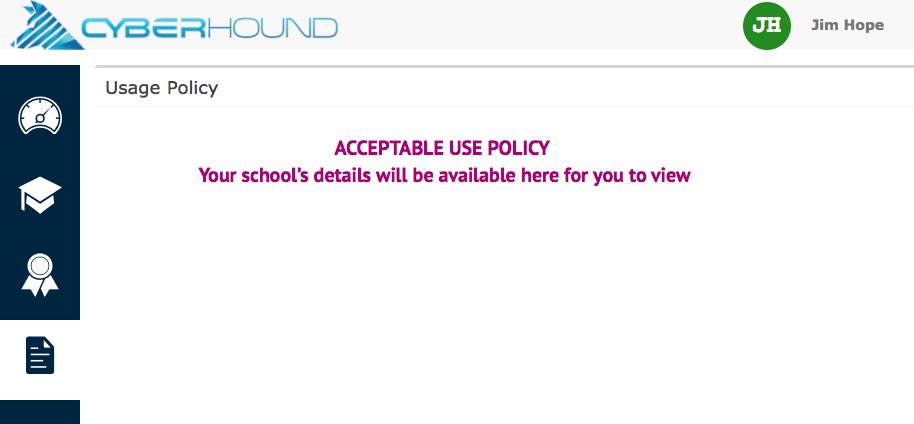
Usage Policy
The School’s acceptable use Internet policy will be available on this screen. The policy may be different for students.
Optional: Your IT Department will determine if this field is available.