LiveZone – System Admin Info Sheet
LiveZone provides access to usage analytics and resources for users in one simple interface. The following provides the steps to configure and customise the interface for different end user experiences.
NOTE: Further technical information, for all areas of the CyberHound Appliance, is available in the Help content area within the Appliance.

Web Interface
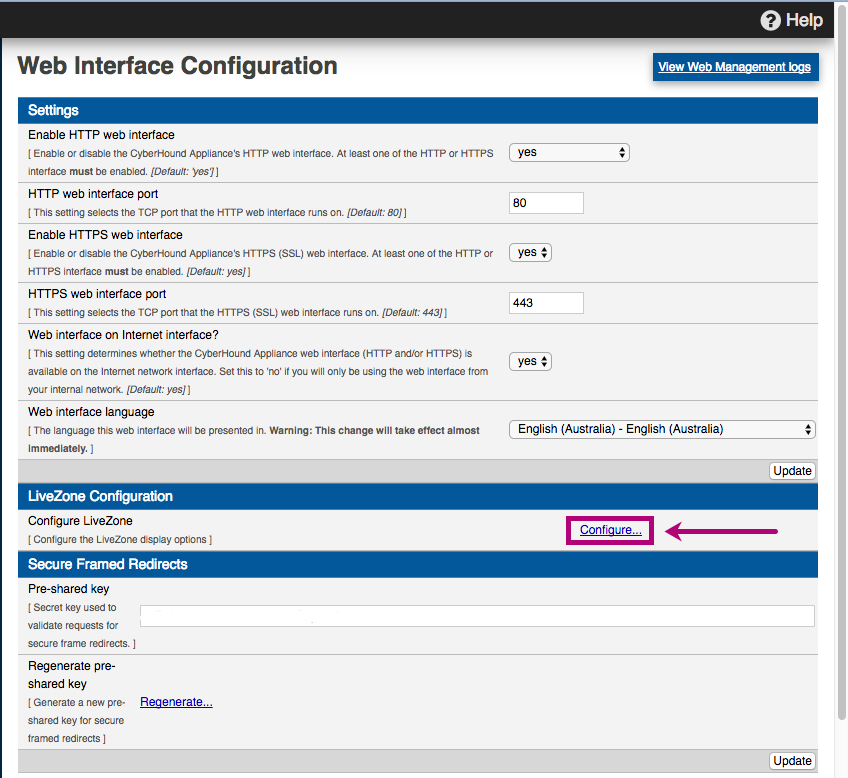
To activate the display options, access via sidebar navigation pane: Configuration > Web Interface
Choose the LiveZone Configuration section and click Configure.
NOTE: The default for LiveZone is set to disabled.
Enable & Customise
System Administrators can enable and customise the LiveZone view.
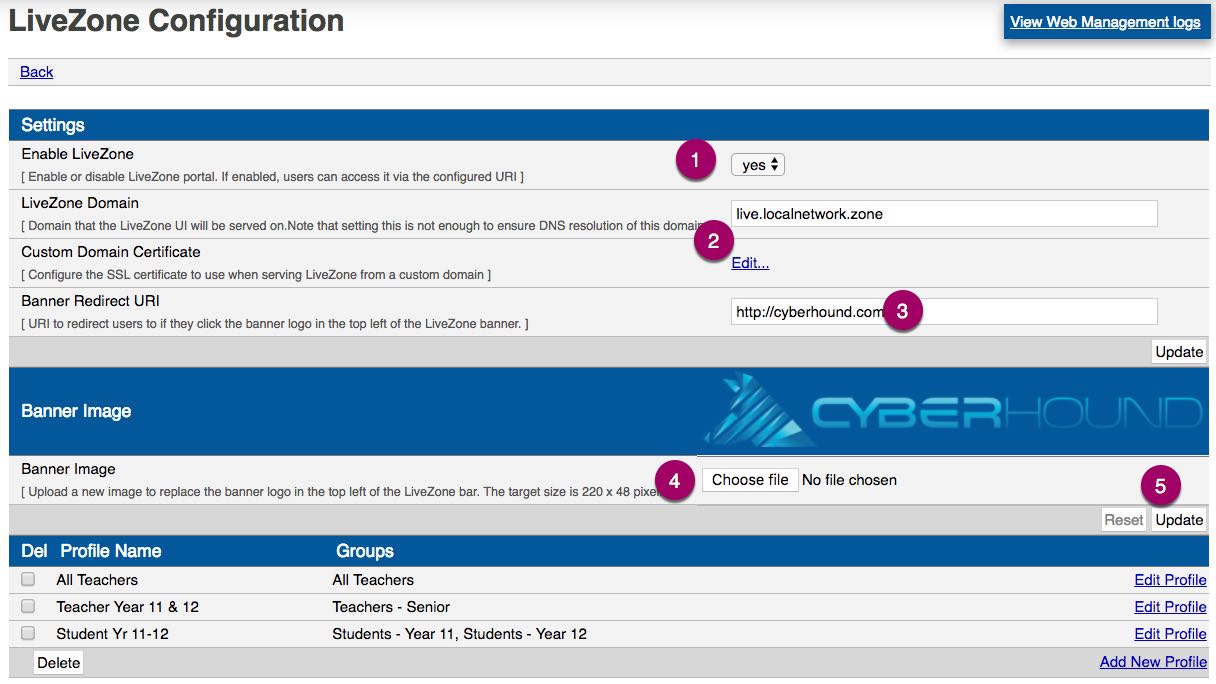
- Enable – Choose ‘yes’ to activate.
- Domain – Enter the domain that the user interface will be served on.
- The default is set to http://live.localnetwork.zone and is accessible to those on the LAN.
- VPN into school network option set-up is http://<sitekey>.chsecure.zone for clients off the LAN.
- DNS – Create a custom (sub)-domain for access.
- Banner Redirect (Optional) – Enter an address for a redirect when a user clicks on the banner. This could be your website home page or another site that all users may visit. The default is http://cyberhound.com.
- Update – Click on ‘Update’ to save your changes.
- Customise Banner – To personalise the user interface, you can add your own logo. Click ‘Choose file’ to load your image (note image size is restricted to 220 x 48 pixels). If no custom banner is added the default is the CyberHound logo.
- Update – Click click on ‘Update’ to save your changes.
Create User Profiles
Profiles are created for users to access LiveZone. Each profile can be configured to create a different end user interface and determine which features are available in the side bar menu. The first icon is LiveView and the only feature that is permanently visible. Each profile is created based on Groups which are available on the CyberHound Appliance via Users & Groups. Additional groups can be added to CyberHound to meet the need for multiple profiles. (refer to System Admin Info – Users & Groups on the website Knowledge Base). LiveZone profiles do NOT require any data source access permissions to be configured. Classroom Control does require teacher groups to have Web Filtering Override permission. (refer to Classroom Control – System Admin Info sheet and see brief notes at the end of this info sheet)
- Teacher View – provides visibility to nominated student’s activity
- Student View – monitor their own activity
- IT Teams – recommended to be separate from any Teacher profiles to allow visibility to all staff and students PLUS enable all features to use IT interface to demonstrate features available and how they could be customised. Add details for onboarding and training end users.
To add a new profile click ‘Add New Profile.’ The Profile name entered is only visible to users who have access to LiveZone configuration. A descriptive name can indicate the settings applied within the profile.
Teacher Profiles
A teacher profile can be configured to provide visibility to match certain student cohorts. e.g. Senior Teacher view only YR10-12 students. Teachers interface has a field to enter a student name and select from three time periods of activity, Last Hour, Today and Yesterday.

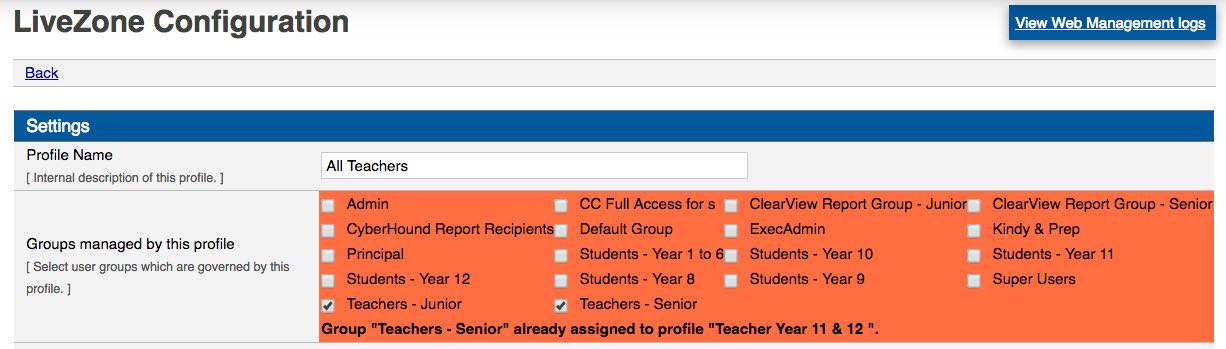
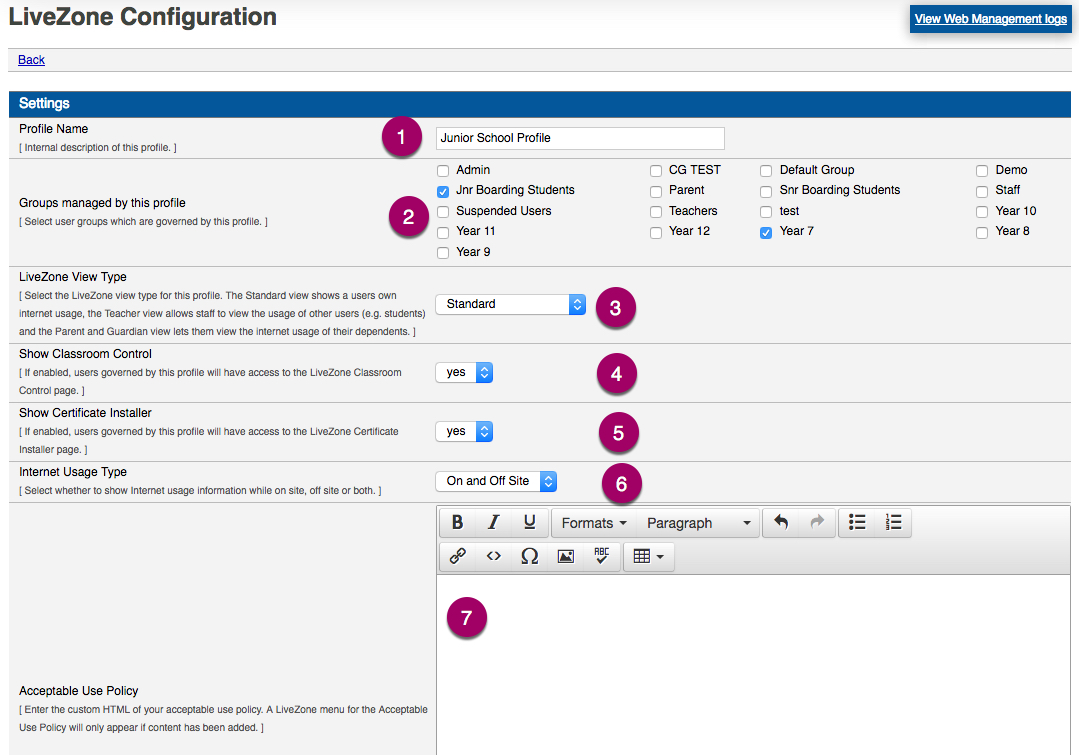
- Profile Name – ‘Type’ in a name for the teacher profile.
- Groups Managed – ‘Select’ the group that this profile applies to.
- View Type – Drop-down option ‘Teacher’ opens two additional fields for selection options.
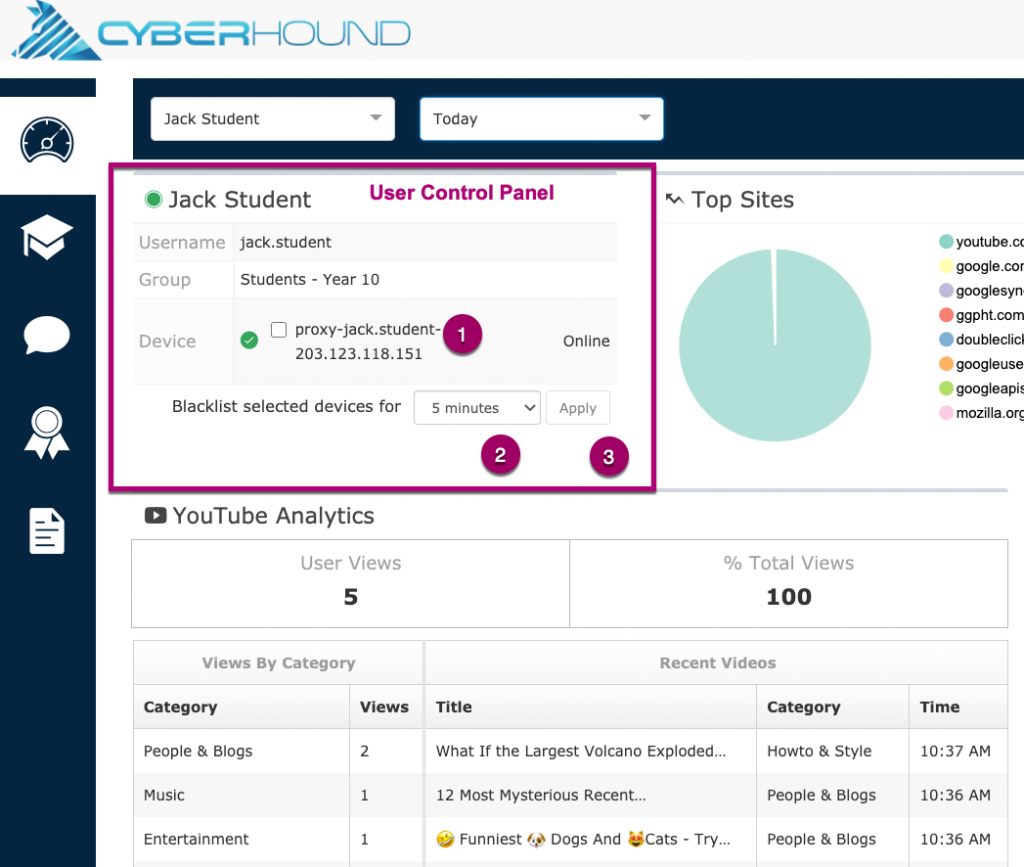
- User Control – Additional field. Select YES provides a panel to view the student status, quota (if enabled) and V32 Blacklisting option. (see Blacklisting section below). If left at NO, the user control panel is NOT visible in the interface.
- Groups Queried – Additional field to ‘Tick’ the student groups to be viewed. As per image above, Senior Teachers group have access to view only student groups Year 10, Year 11 and Year 12.
- Web Filtering Policy – This feature is generally used for a parent or guardian profile, allowing ability to move their child between different Web Filtering Policy groups. Requires configuration with Student Information Systems.
- Classroom Control – YES provides access to the Classroom Control feature on sidebar menu. If NO the icon will not be visible on user interface.
- Certificate Installer – displays the inspection cert page and devices installed. User may self-install the cert at any time and text is customisable. Access via: Internet Auth > BYOD Certificate Installation (see BYOD Customisation section below).
- Internet Usage – used for parent or guardian to show Internet usage on site, off site or both. Off site is used for traffic not traversing the CyberHound Appliance gateway but via the RoamSafe Agent when installed on a student device.
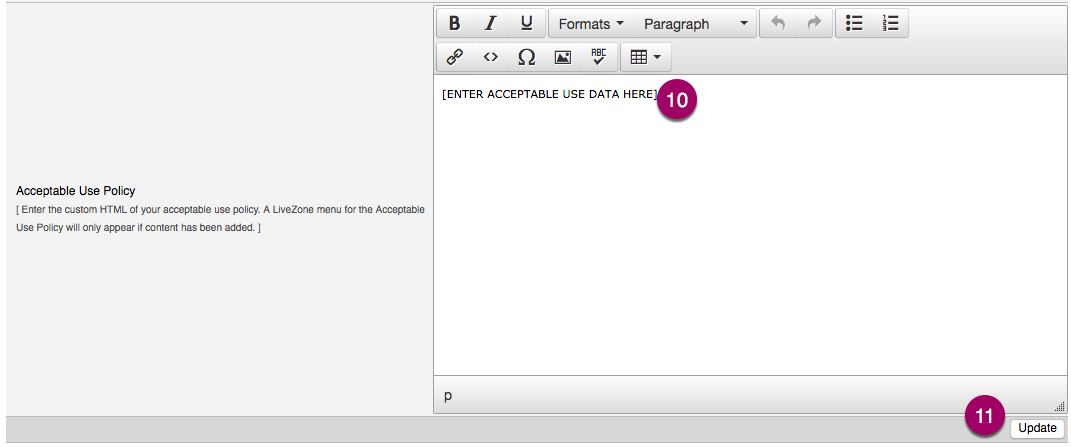
- Acceptable Use Policy – icon will only be visible on the sidebar menu when text added. NOTE: Option to provide different messaging for each profile. e.g. Teacher full time vs part time. Insert a hyperlink to full policy and add text for key summary points. Hyperlinks can be set to open in a new window.
- Update– to save changes click ‘update’.
NOTE: You can only select a Group to be managed by a profile once. An error message will display to advise the selected Group is already assigned to another profile.
Blacklisting for View Type – Teacher
V32 provides the option for blacklisting a device from LiveZone. If the User Control is set to YES, the interface will present how many devices are online and a tick box to select a device to blacklist. The drop down list for selected devices, provides option from 5 mins to 24 hours. If set to NO, this panel is not visible in the users interface. System Administrators could create two profiles with different User Control settings, one YES one NO, but still have each profile view the same group of students. An additional Group would need to be created for a group of users where no blacklisting is intended for the profile configuration. The new group will need to be the primary group when the user authenticates to CyberHound therefore positioned above any other the group the user is a member of in Users & Groups.
Student Profiles
The student profile, set to Standard view, provides the individual with a view of their own activity subject to a valid Internet authentication session. It displays only the last hour of activity.
NOTE: SpeakUp – to enable for students, please refer to the SpeakUp Sys Admin Info Sheet for configuration and options. (This feature is not displayed in the image below)
- Profile Name – ‘Type’ in a name for the student profile.
- Groups Managed – ‘Select’ the group that this profile applies to.
- View Type – Student View should be set to ‘Standard’. Standard means a single user view, this allows the student to see their own data usage for the last hour.
- Classroom Control – Set to YES for the icon to be available on the sidebar menu. Set to NO, the icon will not be visible on the sidebar menu.
- Certificate Installer – displays the inspection cert page and devices installed. User may self-install the cert at any time and text is customisable. Access via: Internet Auth > BYOD Certificate Installation (see notes below for text customisation).
- Internet Usage – used for parent or guardian to show Internet usage on site, off site or both. Off site is used for traffic not routed via the CyberHound Appliance but via the RoamSafe Agent when installed on the device.
- Acceptable Use Policy – icon will only be visible on the sidebar menu when text added. NOTE: option to provide different messaging for each profile. e.g. Seniors vs Junior. Insert a hyperlink to full policy and add text for key summary points. Hyperlinks can be set to open in a new window.
- Update – to save changes click ‘update’.
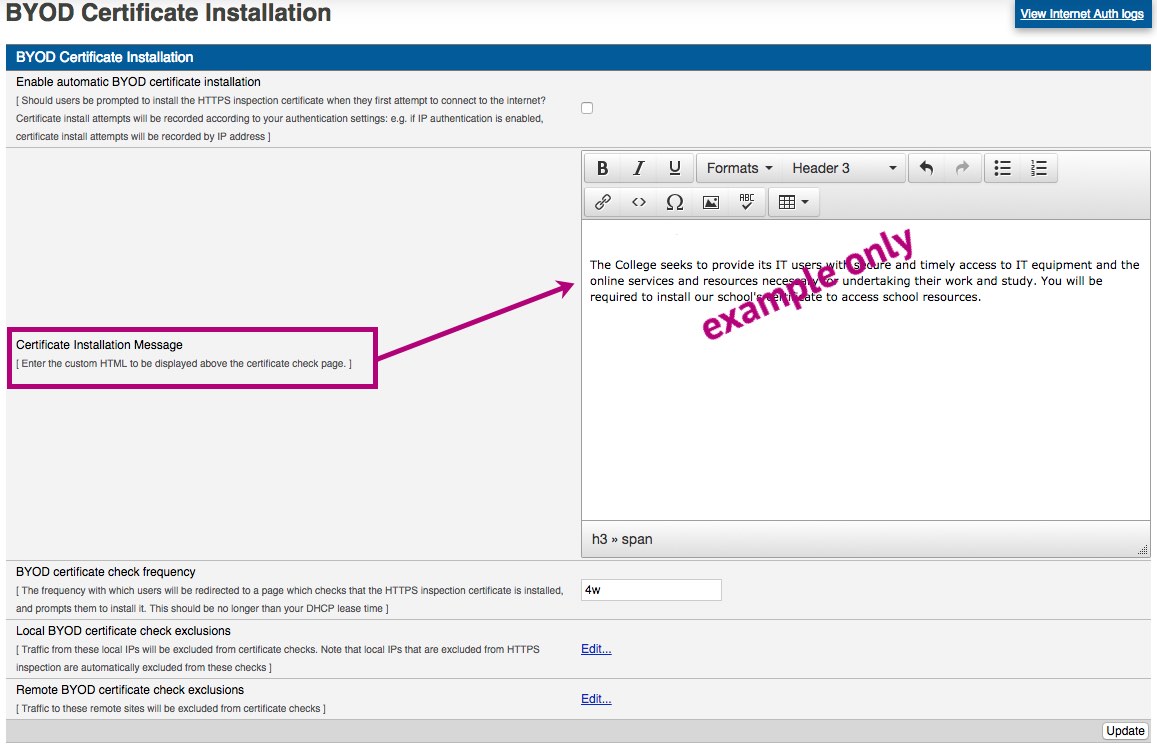
BYOD Certificate Customisation
Access via: Internet Auth > BYOD Certificate Installation
BYOD Certificate Installation is the same for all users and the message added will be available for all profiles viewing the icon on the sidebar menu.
Further information for enabling BYOD Certificate installation checks, is available in the HELP, top right of screen, or contact our Support Team.
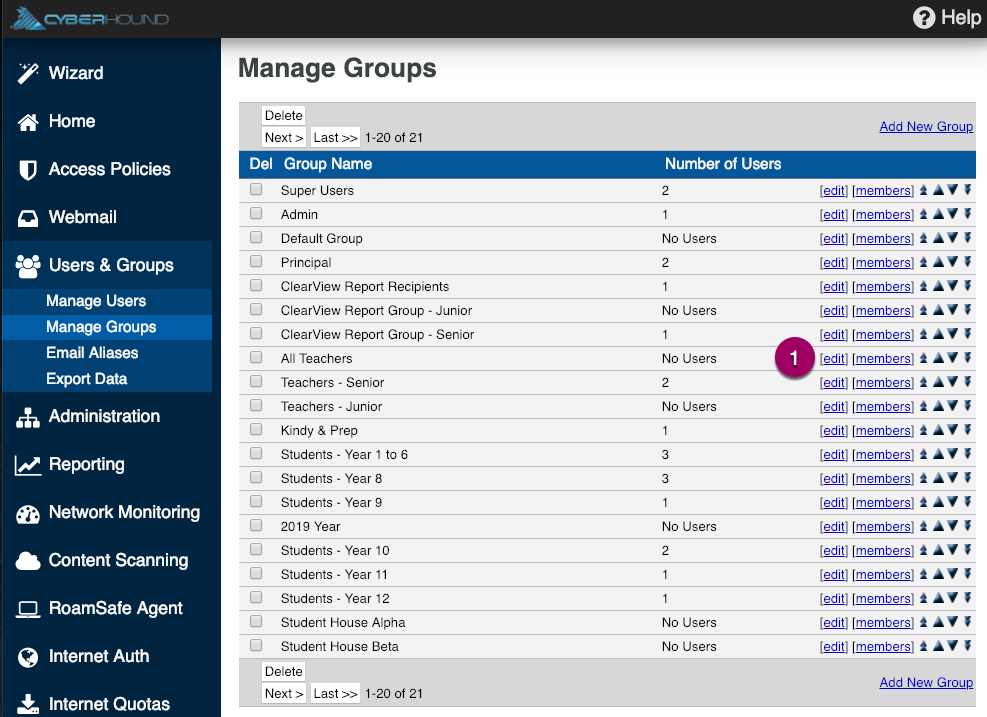
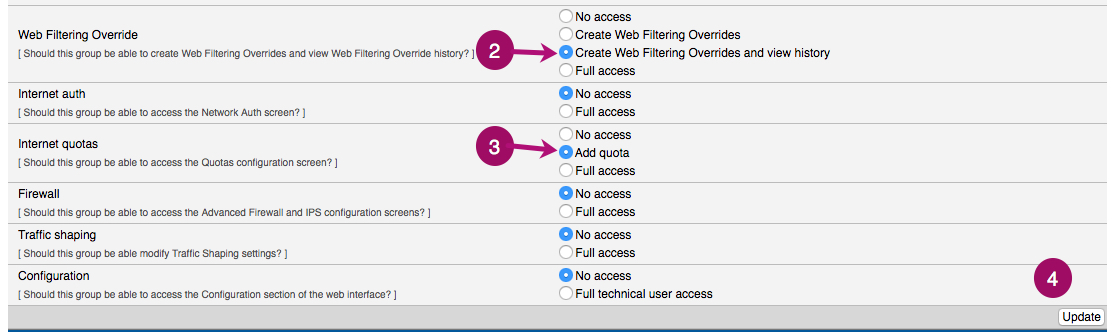
Access Permissions
All user profiles will be able to view the data in LiveZone without granting permissions. However permissions for creation of Classroom Control and adding Internet Quota will need to be provided to teachers. If a user is a member of multiple groups, then provide access permission to the first group in the list the user is a member of.
Access via: Users & Groups > Manage Groups.
- Edit – Edit and Select the relevant Group and click ‘[edit]’
- Classroom Control – select ‘Web Filtering Override’ to allow creation of lesson and to view the lessons the user has created.
- Internet Quotas – if you are using quotas and want the teacher to ‘top-up’ 100MB, then select ‘Add quota’ to the teachers permissions.
- Update – to save changes.
Find out more on LiveZone.