Data Source Access & Permissions
The following information is how to provide a group of users access to one data source, ClearView, but applies for any data source
TOPICS
- How to create a new user groups
- Data source access and limit visibility to specific groups
- Other access considerations
- Examples of the end users views
CyberHound Groups
The Groups assigned determine all CyberHound Appliance user permissions. Groups should align with Active Directory (Security Group not OU) and whilst a user can belong to multiple groups, their permissions to access CyberHound data source queries, etc., are pulled from their primary group. The primary group is the highest group in the group list that they are a member of.
IMPORTANT: CyberHound Appliance will not recognise a nested group from Active Directory. The groups listed need to have users be a direct member of them. Assigning and managing the permissions for ‘Users & Groups’ is predominantly the responsibility of an IT System Administrator.
LDAP – Changes to the permissions are updated every 30 minutes or the time defined by the LDAP Lookup Caching option under Configuration > Advanced.
Flush Cache – Changes can be pushed through under Configuration > Authentication > Flush Authentication Cache.
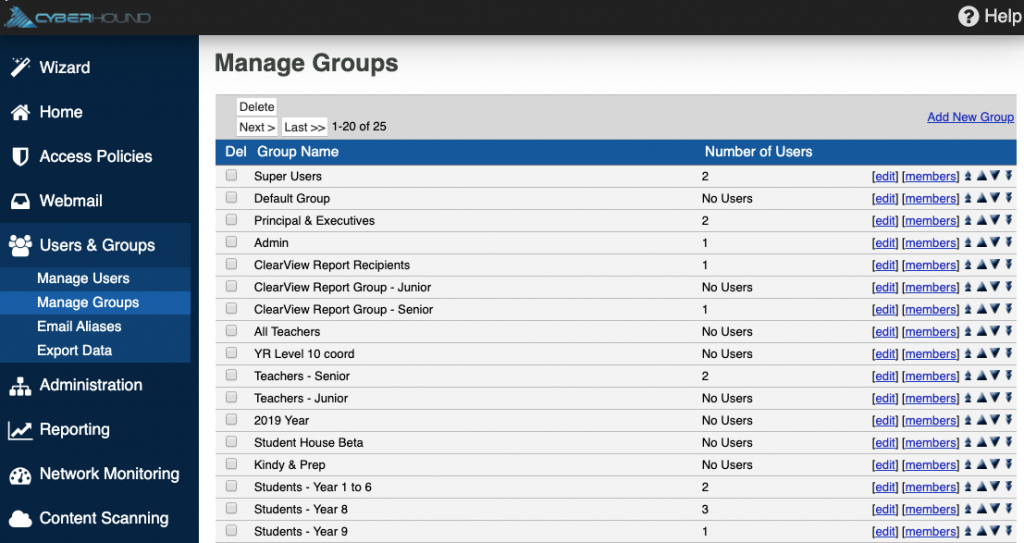
The column, ‘Number of Users’, indicates the members of the group. No Users is pointing to Active Directly and any numbers indicates a user has been added as a local member of the group. Local User can only be a member of one group. To determine which group or groups a user is a member of, access Configuration > Authentication > Test Authentication.
Access via: Users & Groups > Manage Groups
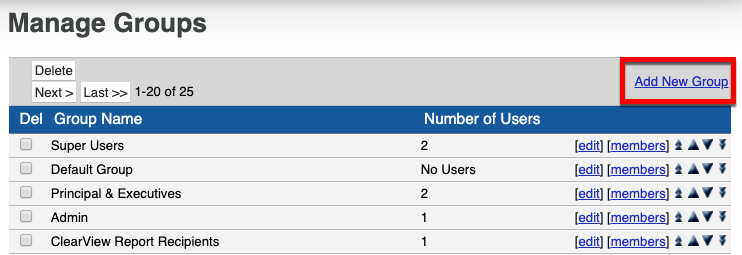
Add New Group
Generally only a limited number of staff will have the responsibility to access and review ClearView activity or results from other data sources. As staff can be a members of multiple Active Directory (AD) groups, creating another AD group may be necessary for these specific staff members. e.g. ClearView Group or Welfare Group. If there are more than one group for different areas of responsibility, Senior vs Junior or House leaders, create groups to meet the organisational needs. Creating more groups can provide the ability to restrict visibility to limited results which means greater protection of data.
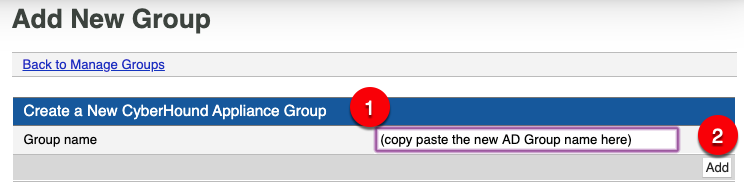
Once you have created your new AD Group and included the users, the Group can be added to the CyberHound Appliance.
Select ‘Add New Group’ and enter the name of the new Group (Tip: copy and paste from AD so it matches exactly to allow LDAP lookup). When you click ‘Add’, the next screen presents to set the relevant permissions. ‘Update’ to save changes. (Refer to next section for permission settings).
HIERARCHY IMPORTANT: New groups are added at the bottom of the list. Each group has a priority, which is used when authenticating. The highest priority (greater access permission) is at the top of the page and priority can be adjusted using the arrows at the right of each row. e.g. A new ClearView Group, would need to be positioned above all other groups that the users are also a member of.
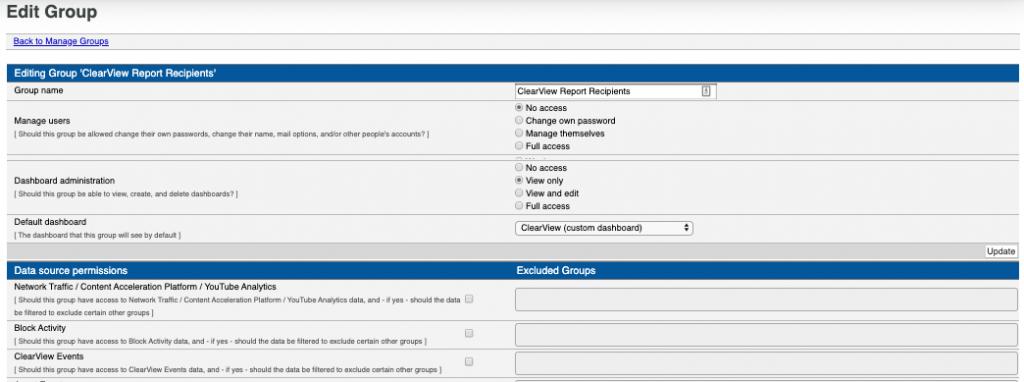
Group Permissions
When adding a new group the screen opens automatically or you can modify an exiting group permissions by selecting ‘[edit]’ from the Manage Group list. The top half of the screen is for configuration settings to access CyberHound functions. Scroll down the page to view ‘Data Source Permissions’ to set a groups permissions for access to view data results.
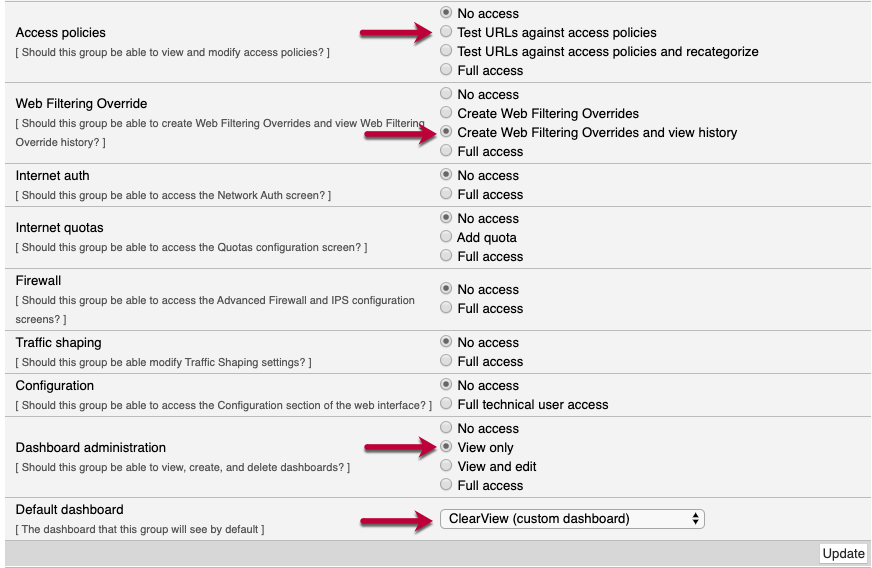
Other Access Considerations: The following is an example of additional permissions that may be considered for a group who needs additional access or data views.
- Access Polices – test URL’s for Classroom Control.
- Web Filtering Override – access to create Classroom Control lessons.
- Dashboard – on the Home page a view only access to a custom dashboard with ClearView widgets.
Note: Web Filtering Override access should be available under the All Staff permission settings.
IMPORTANT: If the configuration access for Reporting Administration or Content Scanning ‘Full Access’ is granted, the User Group will have access to all the reporting functions (create/modify all reports and scheduling) including all data sources. The user would have access to modify and change the Content Scanning Rulesets. Regardless of any data source user exclusions that may be applied, setting full access provides visibility to every user on the network. Full Access is for users who are managing CyberHound and responsible for configuration of all functionalities and visibility to all users authenticated on network.
Data Source Permissions
Access for a user to view data results on the query screen is granted via the ‘Data Source Permissions’.
- Step 1: Is to tick ‘ClearView Events’ data source to provide the access permissions for the Group.
- Step 2: Choose to limit whose data results are viewed. (see below)
CONSIDER: ? Is this group of staff also responsible for review of SpeakUp activity. If NO, create a new group and set permissions accordingly.

Data Source Excluded Groups
Step two is to consider exclusions to restrict access to limit the results available when investigating real-time data. Excluding Groups provides the ability to:
- ALIGN – Student cohorts to relevant welfare staff areas of responsibility. Senior vs Junior or Houses.
- RESTRICT – Access of welfare staff to view other staff activity.
To add excluded groups, simply click into the field and select from the drop down list available and add as many groups that should NOT have their data accessed.
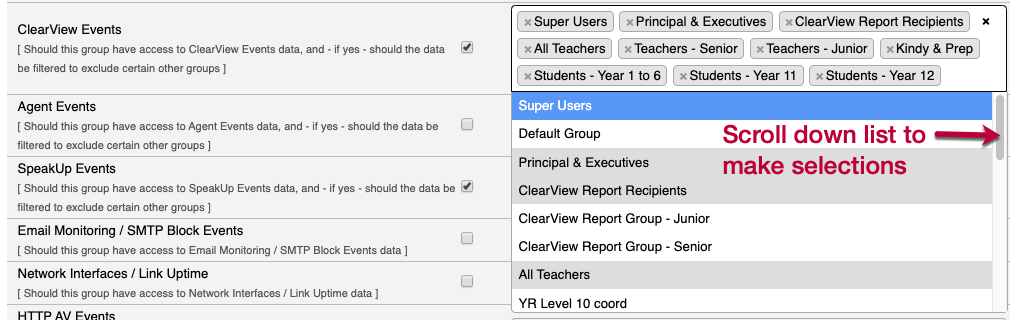
NOTE: If the group is going to have access to other data sources e.g. SpeakUp or Network Monitoring, simply tick the relevant data source and add the exclusions required. Some data sources do not have exclusion options e.g. Email Monitoring, and would provide access to view every user on the network.
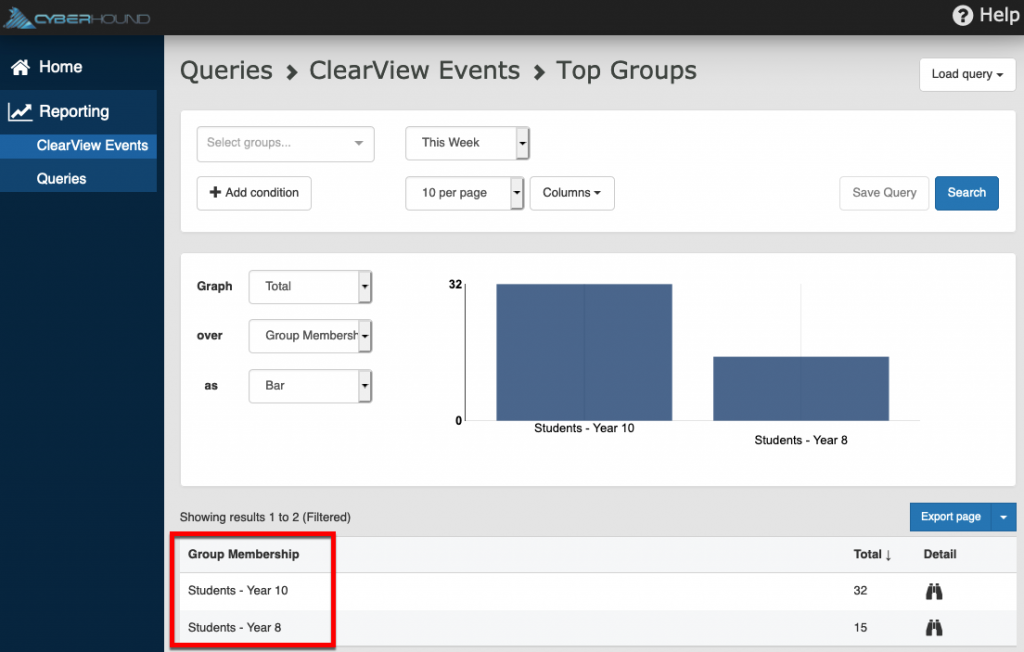
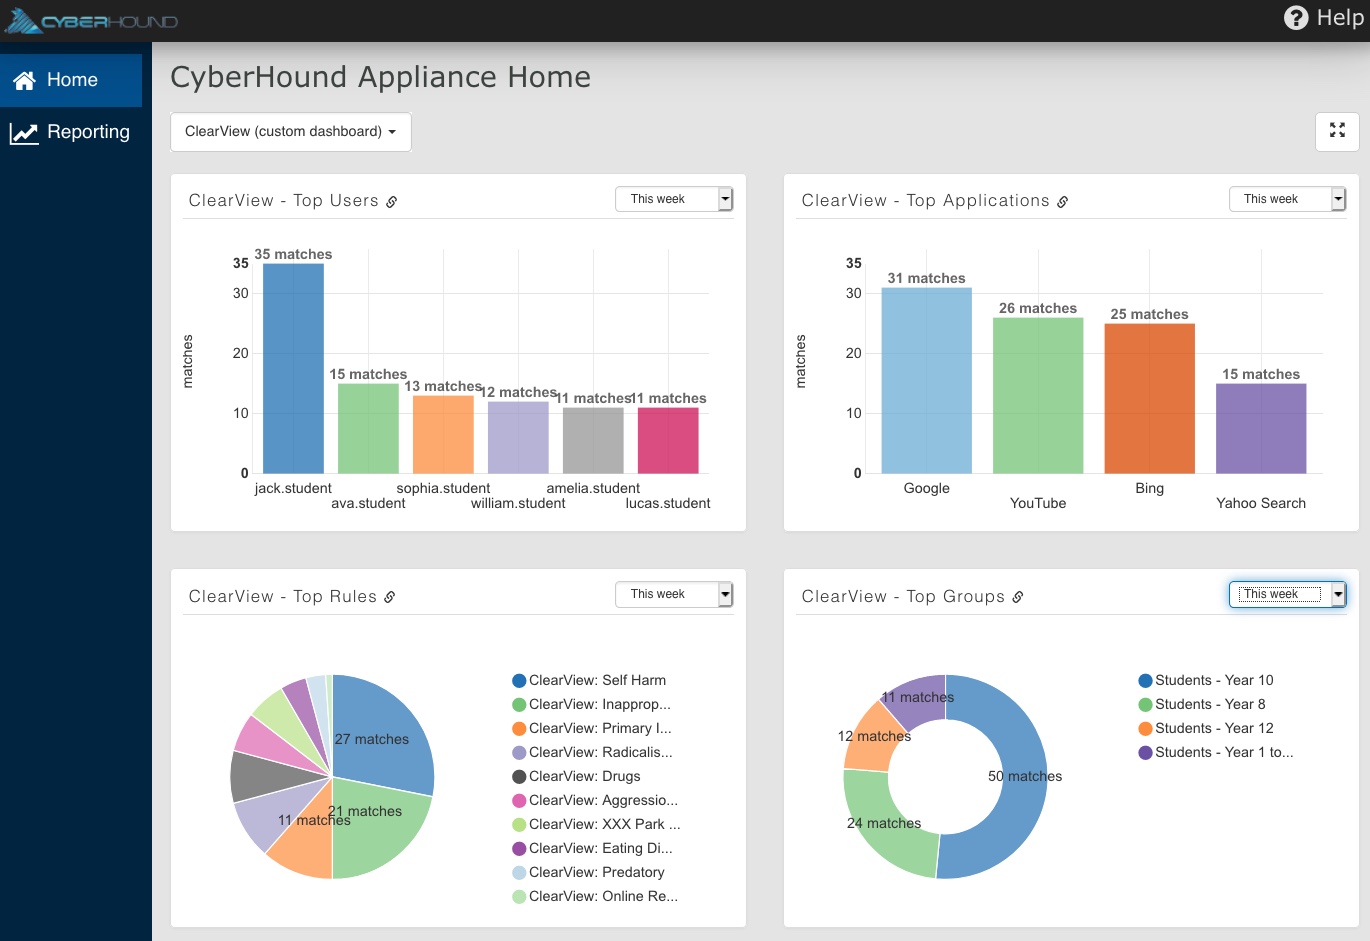
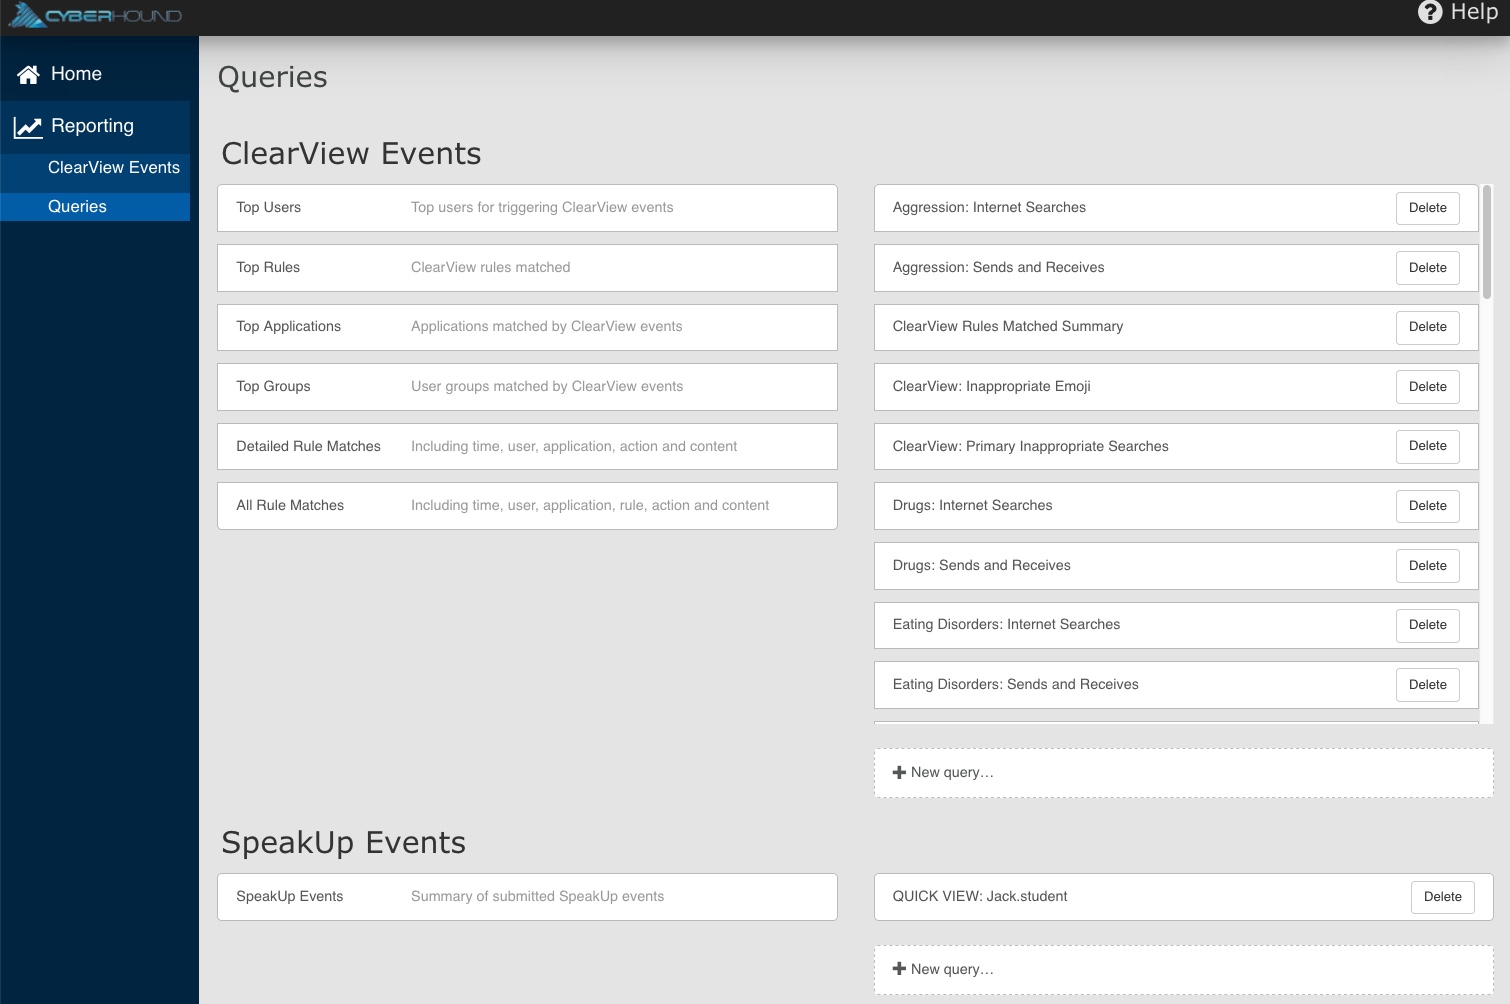
End User Interface Views
The following are examples of the user interface views for the data source permission access to ClearView and SpeakUp and a view only custom dashboard. The navigation side bar only displays the allowed access making it easy for the user to investigate data results. A user can access the CyberHound Appliance from the ‘See Query‘ link in a report and use their username and password to log in.
Dashboard view on the Home Page will only display the custom ClearView results. If user selects another dashboard, no results will load when they have no permission access to other data sources.
Dashboard will display an error and advise the user that there are no permissions allowed to view the data source results.

Data source permission for ClearView Events and SpeakUp will provide access to view only these two data sources when selecting the the ‘Queries’ on the navigation side bar. The user will not have permission to delete a query.
Queries – Group Selection Condition Any excluded groups in permissions settings, will display as greyed out on the query screen and are NOT able to be selected.

Queries – Saved Custom – All queries saved for the data source will be visible in selection list, however, queries for an individual user not allowed by group exclusions, will not load results.